
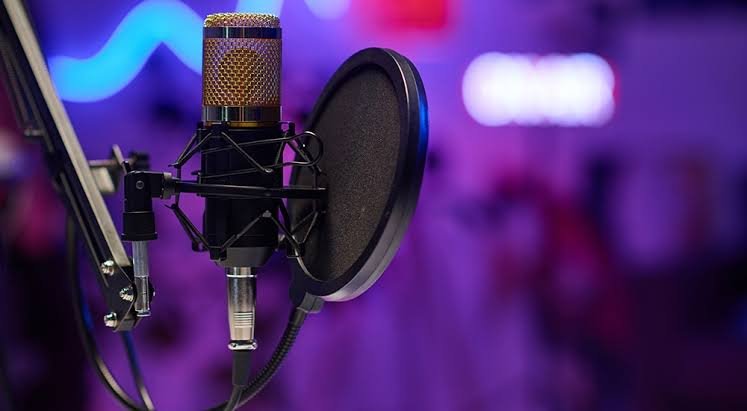
Finding the best microphone for voice acting can make a major difference in the quality of voice-over recordings. Whether you are recording animation, video games, commercials, audiobooks, narration, podcasts, or character voices, the microphone you choose can affect clarity, detail, warmth, background noise, and the overall professional sound of your recording.
However, choosing a microphone for voice acting is not simply about buying the most expensive model available. Different microphones have different pickup patterns, frequency responses, sensitivities, and recording characteristics. Your room, voice type, recording equipment, and experience level are also important factors.
A good voice-acting microphone should capture speech clearly while producing a natural and detailed sound. It should also work well with your recording environment and audio interface.
This guide explains what to look for when choosing the best microphone for voice acting, including condenser and dynamic microphones, important features, room considerations, microphone placement, and common mistakes to avoid.
What Is the Best Microphone for Voice Acting?
There is no single microphone that is perfect for every voice actor. The ideal choice depends on your voice, recording environment, budget, and the type of work you plan to do.
For many professional studio environments, large-diaphragm condenser microphones are popular because they can capture detailed vocal performances with a wide frequency response.
Dynamic microphones can also be excellent choices, especially when recording in untreated rooms. They generally capture less room ambience and can be more forgiving when background noise or room reflections are a problem.
The best microphone is therefore the one that captures your voice naturally and consistently in your specific recording environment.
What Should You Look for in a Voice-Acting Microphone?
Before buying a microphone, consider several important specifications and practical factors.
| Feature | Why It Matters for Voice Acting |
|---|---|
| Microphone type | Determines sensitivity and recording characteristics |
| Polar pattern | Controls which directions the microphone captures |
| Frequency response | Influences the tone and detail of your voice |
| Sensitivity | Determines how strongly the microphone responds to sound |
| Self-noise | Lower noise can benefit quiet recordings |
| Connectivity | Determines how the microphone connects to your equipment |
| Build quality | Important for long-term use |
| Room compatibility | Some microphones work better in untreated spaces |
| Budget | Determines available features and microphone options |
Specifications are useful, but they should not be considered in isolation. A microphone with impressive specifications may still be a poor choice if it does not suit your voice or recording room.
Condenser vs Dynamic Microphones for Voice Acting
One of the biggest decisions is whether to choose a condenser or dynamic microphone.
Condenser Microphones
Condenser microphones are widely used for studio vocals and voice-over recording. They are typically sensitive and capable of capturing subtle details in a performance.
This can make them particularly useful for professional voice acting where clarity, expression, and vocal detail are important.
However, their sensitivity can also be a disadvantage in noisy or untreated rooms because they may capture more room reflections and environmental sounds.
Dynamic Microphones
Dynamic microphones are generally less sensitive than condenser microphones. This can make them useful for home studios where acoustic treatment is limited.
They can reject some unwanted room sound depending on the microphone design and placement, while still producing a strong voice recording.
For actors recording in bedrooms, offices, or other untreated environments, a suitable dynamic microphone can sometimes produce a cleaner result than a highly sensitive condenser microphone.
Why Your Recording Room Matters
Many beginners assume that the microphone is the most important part of voice recording. While microphone quality matters, the recording environment can have an equally significant impact.
A high-end microphone in a room with strong echoes can produce recordings that sound less professional.
Hard surfaces such as bare walls, windows, floors, and ceilings can reflect sound back toward the microphone. These reflections can create a boxy, echoey, or distant sound.
Simple acoustic improvements can help.
Consider using:
- Acoustic panels
- Thick curtains
- Rugs
- Bookshelves
- Soft furnishings
- Portable vocal booths
- Strategic microphone positioning
The goal is not necessarily to make the room completely silent. Instead, you want to reduce unwanted reflections and external noise.
Best Microphone Type for a Home Voice-Acting Studio
If you have a quiet, acoustically treated room, a quality condenser microphone can be an excellent choice.
If your room is noisy or has noticeable reflections, a dynamic microphone may be easier to work with.
USB microphones can also be convenient for beginners because they can connect directly to a computer without requiring a separate audio interface.
XLR microphones, meanwhile, provide a more traditional studio setup and can be connected to an audio interface or mixer.
The best choice depends on how much control and flexibility you want from your recording system.
USB vs XLR Microphones
USB Microphones
USB microphones are popular with beginners because they are simple to set up.
They can connect directly to a computer, making them convenient for voice actors who are starting out.
Advantages include:
- Easy installation
- Simple setup
- No separate audio interface required
- Convenient for home recording
- Good option for beginners
However, USB microphones can offer less flexibility than a traditional XLR setup as your studio develops.
XLR Microphones
XLR microphones are common in professional recording environments.
They normally require an audio interface, which provides microphone preamplification and converts the analog signal into digital audio.
Advantages include:
- Flexible studio setup
- Easy integration with professional equipment
- Upgradeable recording chain
- Wide range of microphone choices
For voice actors planning to build a long-term recording setup, an XLR microphone can be a strong investment.
Microphone Polar Patterns for Voice Acting
Polar patterns describe how a microphone responds to sound from different directions.
The cardioid pattern is particularly common for vocal recording because it primarily captures sound from the front while reducing sensitivity to sounds from the sides and rear.
This can help focus the recording on the actor’s voice.
Other polar patterns include omnidirectional and figure-eight patterns, but they are less commonly needed for basic voice-over recording.
When choosing the best microphone for voice acting, a cardioid microphone is often a practical starting point.
Microphone Placement Matters
Even the best microphone can sound poor if it is positioned incorrectly.
A common starting point is to place the microphone roughly several inches away from the mouth, although the ideal distance depends on the microphone, voice, room, and desired sound.
Using a pop filter can help reduce plosive sounds caused by strong bursts of air from sounds such as “P” and “B.”
The microphone should generally be positioned so the actor can perform naturally without constantly moving toward or away from it.
Small changes in distance and angle can significantly affect the recorded tone.
Use a Pop Filter
A pop filter is a simple but valuable accessory for voice acting.
Plosive sounds occur when bursts of air hit the microphone capsule. These bursts can create unwanted low-frequency noises.
A pop filter helps reduce these effects and allows the actor to maintain a consistent recording position.
A foam windscreen can also provide some protection, although pop filters are particularly useful for studio-style vocal recording.
Choose a Microphone Based on Your Voice
Every voice is different.
Some voices are naturally bright and detailed, while others are darker, deeper, or more resonant.
A microphone that sounds excellent on one voice may not produce the same results on another.
For example, a bright microphone may emphasize clarity on a darker voice but could make an already bright voice sound overly sharp.
Similarly, a microphone with a warmer character may complement certain voices but sound less detailed with others.
Whenever possible, listen to recordings of your own voice through different microphones before making a final decision.
Best Microphone for Different Voice-Acting Uses
Different types of voice work can have slightly different requirements.
| Voice-Acting Use | Important Microphone Qualities |
|---|---|
| Animation | Detail and expressive vocal capture |
| Video games | Clear dialogue and consistent tone |
| Audiobooks | Natural sound and low noise |
| Commercials | Clear and polished vocal presentation |
| Character voices | Detail and dynamic response |
| Narration | Natural speech reproduction |
| E-learning | Clarity and intelligibility |
| Home studio work | Good room compatibility |
There is no universal winner because the best microphone depends on the performer and recording environment.
Best Microphone for Beginners
Beginners should avoid spending their entire budget on a microphone while ignoring other equipment.
A complete voice recording setup may include:
- Microphone
- Mic stand or boom arm
- Pop filter
- Headphones
- Audio interface for XLR microphones
- Recording software
- Basic acoustic treatment
A reasonably priced microphone combined with a quiet room, proper placement, and good recording technique can produce better results than an expensive microphone used incorrectly.
Microphone Accessories You May Need
The microphone itself is only one part of a voice-acting setup.
Microphone Stand
A stable stand prevents unwanted movement and handling noise.
Boom Arm
A boom arm provides flexible positioning and can make it easier to maintain a consistent recording distance.
Pop Filter
A pop filter helps reduce plosive sounds.
Closed-Back Headphones
Closed-back headphones allow you to monitor your voice while reducing sound leakage into the microphone.
Audio Interface
An audio interface is required for most XLR microphones. It provides microphone inputs and converts the analog signal for your computer.
Common Mistakes When Buying a Voice-Acting Microphone
New voice actors often make several mistakes when choosing equipment.
One common mistake is focusing only on microphone price. More expensive does not automatically mean better for every voice or room.
Another mistake is buying a highly sensitive condenser microphone for an untreated room without considering reflections and background noise.
Some beginners also overlook microphone technique. Poor positioning, inconsistent distance, and improper gain levels can negatively affect recordings.
Finally, buying equipment without considering the complete setup can result in compatibility problems or unnecessary spending.
How to Get Professional Voice-Over Sound
A professional recording depends on more than the microphone.
Start with a quiet recording environment. Position the microphone correctly and maintain a consistent distance.
Set the input gain so your recording is strong without clipping.
Record several test takes and listen carefully through headphones.
Pay attention to:
- Background noise
- Echo
- Plosives
- Sibilance
- Distortion
- Room reflections
- Inconsistent microphone distance
Small improvements in recording technique can make a significant difference.
Should You Buy an Expensive Microphone?
Not necessarily.
A high-end microphone can be valuable for professional studios and experienced voice actors, but beginners can often achieve excellent results with a more affordable microphone.
The best approach is to establish a realistic budget and allocate money across the entire recording chain.
For example, spending your complete budget on a microphone while recording in a highly reflective room may produce disappointing results.
A balanced setup with a good microphone, proper accessories, decent headphones, and basic acoustic treatment can be more effective.
How to Choose the Best Microphone for Voice Acting
Before making your purchase, ask yourself these questions:
- Is my recording room quiet?
- Is the room acoustically treated?
- Do I want USB or XLR connectivity?
- What type of voice do I have?
- What kind of voice acting will I record?
- What is my total equipment budget?
- Do I need a microphone that can grow with my studio?
- Will I be recording close to the microphone?
- Do I need additional equipment such as an audio interface?
- Can I test the microphone before purchasing?
Answering these questions can make the buying process much easier.
Best Microphone for Voice Acting: Final Recommendation
The best microphone for voice acting is not necessarily the most expensive microphone on the market. The right choice depends on your voice, recording room, budget, microphone technique, and type of voice-over work.
A condenser microphone can be an excellent choice for a quiet and acoustically controlled studio where detailed vocal capture is important. A dynamic microphone can be a practical alternative for untreated rooms and environments where background noise is more difficult to control.
USB microphones offer simplicity for beginners, while XLR microphones provide greater flexibility for users who want to develop a more traditional studio setup.
Most importantly, remember that professional voice acting is about the entire recording chain. A good microphone, quiet environment, proper positioning, acoustic treatment, clean gain levels, and strong performance all contribute to a high-quality recording.
Instead of choosing a microphone based solely on popularity or price, choose one that complements your voice and recording environment. With the right setup and technique, even a relatively affordable microphone can produce clean, detailed, and professional-sounding voice recordings.
Frequently Asked Questions About the Best Microphone for Voice Acting
What is the best microphone for voice acting?
The best microphone depends on your voice, recording environment, budget, and type of voice work. Condenser microphones are popular for detailed studio recordings, while dynamic microphones can be useful in untreated or noisier rooms.
Is a condenser or dynamic microphone better for voice acting?
Neither is universally better. Condenser microphones can capture detailed vocals in quiet rooms, while dynamic microphones can be more forgiving in environments with background noise and room reflections.
Do voice actors need an expensive microphone?
No. A high-quality recording depends on the entire setup, including the room, microphone technique, accessories, and recording equipment. A well-positioned affordable microphone can produce excellent results.
Is a USB microphone good for voice acting?
Yes. A quality USB microphone can be a convenient choice for beginners, home studios, narration, and other voice applications. XLR microphones offer greater flexibility for more advanced recording setups.
How far should a microphone be from your mouth?
There is no single distance that works for every microphone. A position several inches from the mouth is a useful starting point, but the ideal distance depends on the microphone, voice, room, and desired sound.
Do I need an audio interface for voice acting?
You generally need an audio interface when using an XLR microphone. USB microphones typically connect directly to a computer and do not require a separate interface.
Does room treatment matter more than the microphone?
Both matter, but a poor recording environment can seriously affect the final sound. Echoes and reflections can remain in the recording even when using an expensive microphone, so basic acoustic treatment can be extremely valuable.
What accessories should a voice actor buy?
Useful accessories include a stable microphone stand or boom arm, pop filter, headphones, and, for XLR microphones, an audio interface. Basic acoustic treatment can also improve recording quality.


